Craft Perfect Cream Cheese Mints: A Simple Guide to Irresistible Treats
There's something uniquely charming about an old-fashioned homemade treat, and cream cheese mints are a prime example. These delightful little candies, often remembered from childhood parties, holiday gatherings, or even as elegant wedding favors, offer a melt-in-your-mouth experience that is both refreshing and incredibly satisfying. Far from the intimidating world of complex candy making, learning
how to make cream cheese mints is surprisingly straightforward, requiring no cooking and just a handful of common ingredients. Whether you're a seasoned baker or a kitchen novice, this comprehensive guide will walk you through everything you need to know to create your own batch of these customizable, delicious mints, perfect for any occasion.
Why Cream Cheese Mints Are Your Next Go-To Treat
Cream cheese mints hold a special place in the hearts of many, not just for their sweet flavor, but for their incredible ease of preparation and nostalgic appeal. Unlike many confectionery creations that demand precise temperatures and intricate techniques, these mints are famously simple. They're a "no-cook" recipe, meaning you won't need to fuss with candy thermometers or boiling sugar – just mix, shape, and chill! This makes them an ideal project for busy individuals or even a fun activity to do with kids.
Often referred to as "wedding mints" or sometimes compared to butter mints, their soft, pillowy texture and delicate flavor make them a versatile option for various events. Imagine them as charming favors for a bridal shower, a baby shower, or, of course, a wedding. They also add a lovely touch to holiday platters, birthday parties, or simply as a sweet indulgence to brighten an ordinary day. The simple joy of creating something so delicious with minimal effort is a reward in itself, ensuring that these treats continue to be a relevant and cherished part of our culinary traditions. For more on their timeless appeal and no-cook simplicity, check out our article on
Easy Cream Cheese Mints: An Old-Fashioned No-Cook Recipe.
The Essential Ingredients for Irresistible Cream Cheese Mints
One of the beautiful aspects of cream cheese mints is their reliance on just a few, readily available ingredients. Don't let the simplicity fool you, though; each component plays a crucial role in achieving that perfect texture and flavor. To master
how to make cream cheese mints that everyone will rave about, pay attention to the details of these six key players:
- Cream Cheese: This is the star of the show. For the absolute best flavor and a wonderfully smooth texture, opt for full-fat cream cheese. It's imperative that the cream cheese is softened completely at room temperature before you begin mixing. Cold cream cheese will lead to lumps and an uneven dough.
- Powdered Sugar (Confectioners' Sugar): This fine sugar not only provides the necessary sweetness but also acts as the primary binding agent, giving the mints their structure and melt-in-your-mouth consistency. You'll need a significant amount, and possibly a little extra for adjusting the dough.
- Unsalted Butter: Just a tablespoon of softened unsalted butter goes a long way. It contributes a rich, velvety mouthfeel and ensures the mints have that desirable soft texture.
- Pure Vanilla Extract: While seemingly a small addition, vanilla extract enhances the overall flavor profile. It subtly complements the mint, adding warmth and depth without overpowering it.
- Peppermint Extract: This is where the characteristic "mint" flavor comes from. It's crucial to use pure peppermint extract. Avoid "mint extract" or "spearmint extract" as these can sometimes impart a flavor reminiscent of toothpaste, which is definitely not what we're aiming for! Peppermint delivers that classic, clean, and refreshing taste.
- Gel Food Coloring: To make your cream cheese mints festive and perfectly suited to any theme, gel food coloring is your best friend. Gels provide vibrant colors with just a small amount, minimizing added moisture that could alter the dough's consistency.
Ensuring your cream cheese and butter are at room temperature is perhaps the most important pre-step. This allows them to cream together smoothly with the other ingredients, preventing a grainy texture and making the dough much easier to work with.
Step-by-Step Guide: How to Make Cream Cheese Mints Perfectly
Now for the fun part: bringing all those simple ingredients together to create your delectable mints. Follow these straightforward steps to master
how to make cream cheese mints:
- Prepare Your Base: In a large mixing bowl, combine your fully softened full-fat cream cheese, softened unsalted butter, pure vanilla extract, and pure peppermint extract. Using a handheld electric mixer or a stand mixer with a paddle attachment, beat these ingredients together until they are smooth and well combined. Scrape down the sides of the bowl as needed to ensure everything is incorporated.
- Gradually Add Powdered Sugar: With the mixer on low speed, begin adding the powdered sugar, about 1 cup at a time. This gradual approach is key to avoid a "sugar storm" (a cloud of powdered sugar escaping the bowl!). Continue mixing until each addition is fully incorporated before adding more. Once all the sugar is in, continue mixing until the dough is smooth, creamy, and comes together.
- Test and Adjust Consistency: This is a critical step. Take a small amount of the mint mixture and try to form it into a ball with your hands. It should be soft and pliable but *not* sticky. If the dough feels too sticky or wet, add additional powdered sugar, one tablespoon at a time, mixing well after each addition, until you achieve a firm, easy-to-handle dough. If it's too crumbly, you might have added too much sugar, or your cream cheese wasn't soft enough; try adding a tiny bit more softened cream cheese or butter, half a teaspoon at a time, until the consistency is right.
- Add Food Coloring: If you plan to make multiple colors, divide the dough into separate bowls now. Add a small amount of gel food coloring to each bowl (start with a tiny drop, as gel colors are highly concentrated) and mix thoroughly with a spoon or your hands until the desired shade is achieved. Remember, you can always add more color, but you can't take it away!
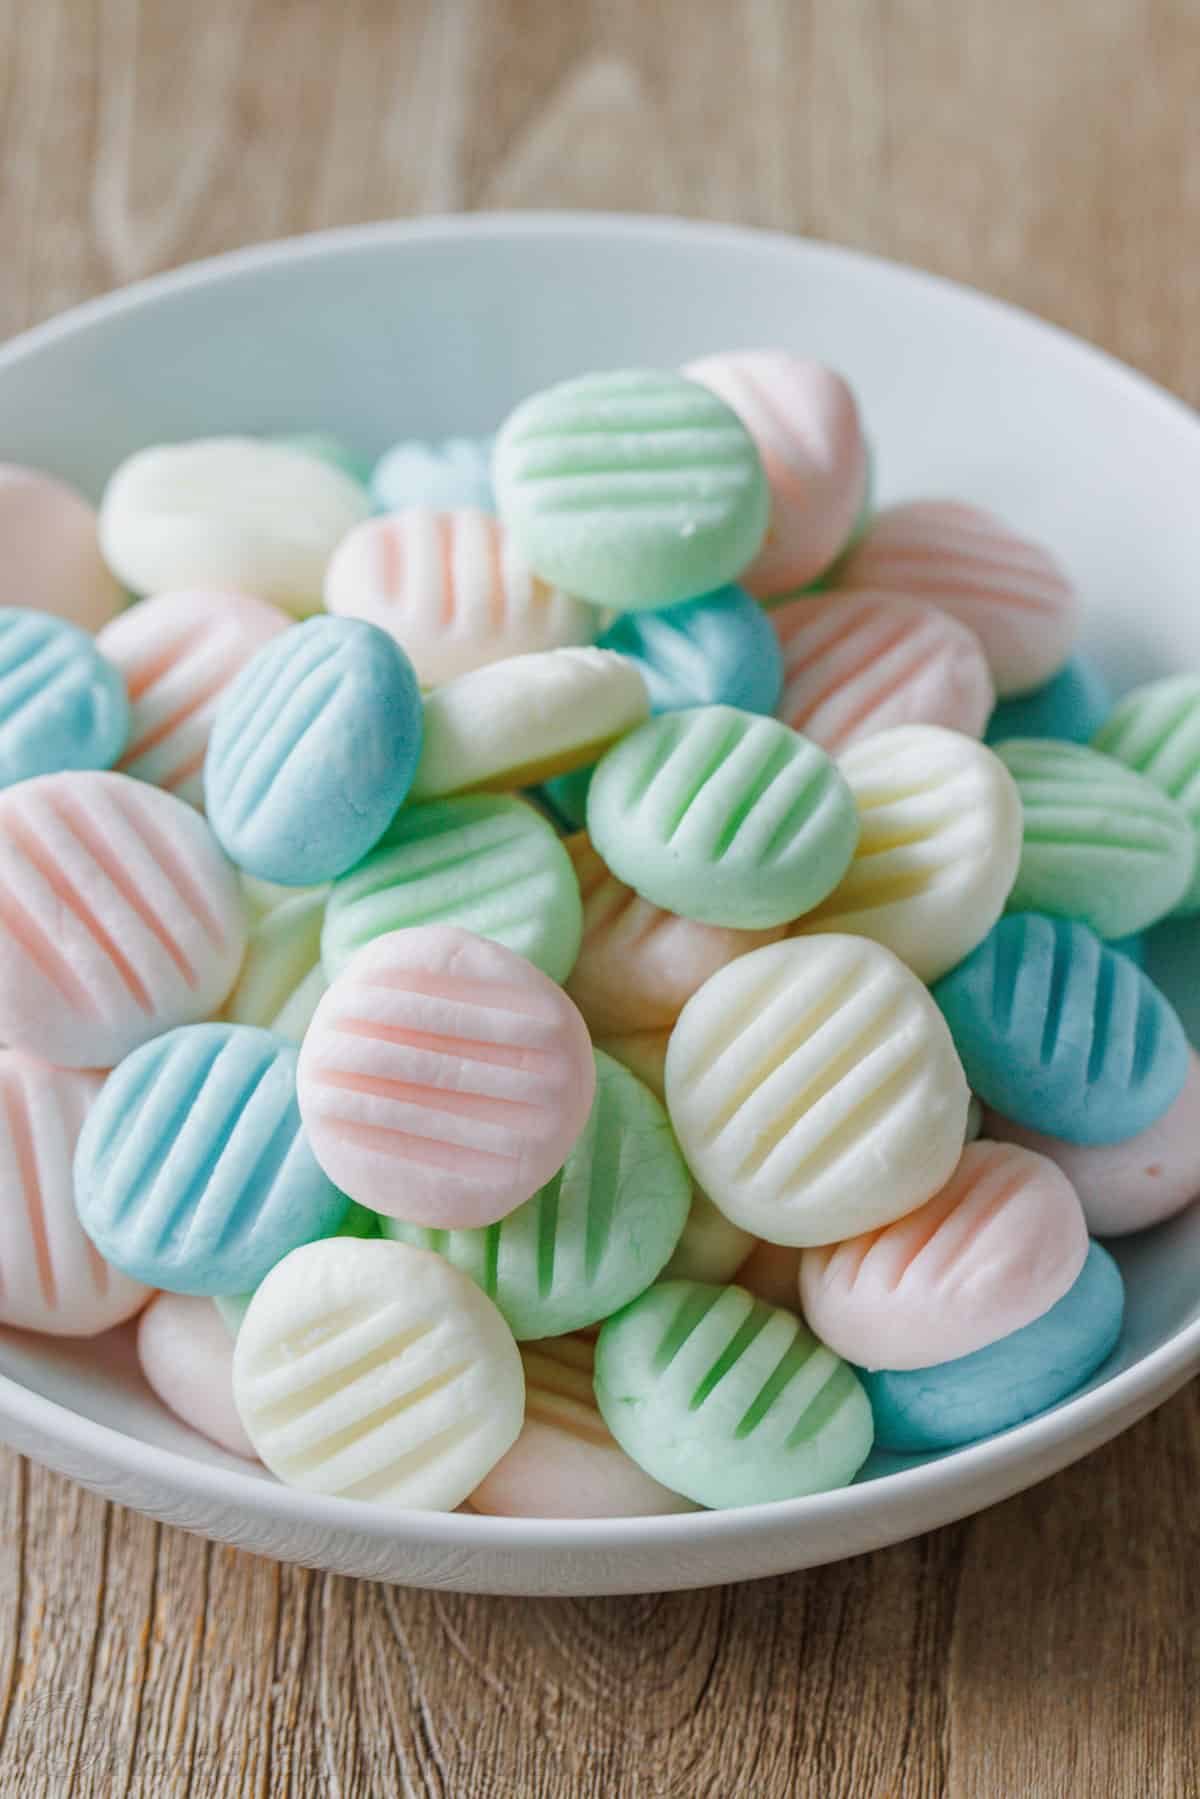
- Shape Your Mints: There are several ways to shape your cream cheese mints:
- Simple Balls: Roll small portions of dough (about ½ to 1 teaspoon) between your palms into neat little balls.
- Fork Pressed: After rolling into a ball, gently flatten it slightly and press the tines of a fork into the top to create a classic ridged pattern.
- Candy Molds: For more intricate designs, lightly dust silicone candy molds (often available in floral, leaf, or themed shapes) with powdered sugar. Press the dough firmly into the molds, then gently unmold.
Place your shaped mints on a parchment-lined baking sheet or platter.
- Set the Mints: Once shaped, the mints need time to firm up. Refrigerate them for at least 30 minutes, or ideally 1-2 hours, until they are firm to the touch. You can also leave them uncovered at room temperature overnight to dry out slightly for a chewier texture.
Unleash Your Creativity: Customizing Your Cream Cheese Mints
One of the most exciting aspects of learning
how to make cream cheese mints is the endless possibilities for customization. These treats are a blank canvas, allowing you to tailor them perfectly to any theme, holiday, or personal preference. For inspiration on incorporating these into your celebrations, be sure to read our article on
Homemade Cream Cheese Mints: Sweet Treats for Holidays and Parties.
- Colors: This is perhaps the easiest way to customize.
- Holidays: Red and green for Christmas, pastels for Easter or spring, orange and black for Halloween, red, white, and blue for patriotic events.
- Parties: Match the colors to your party theme, school colors, or favorite sports team.
- Weddings/Showers: Soft whites, creams, pinks, blues, or mint green create an elegant touch.
- Flavors: While peppermint is traditional and highly recommended, you can experiment with other extracts to create unique varieties. (Note: If trying non-peppermint, always taste test the dough before committing large batches!)
- Almond Extract: For a sophisticated, nutty flavor.
- Lemon or Orange Extract: For a bright, citrusy twist.
- Wintergreen Extract: For a different kind of mint flavor, though ensure you enjoy its distinct taste.
- Chocolate Mint: A tiny bit of cocoa powder mixed in, along with peppermint extract, can create a delicious chocolate mint flavor.
- Shapes: Beyond the classic fork press:
- Candy Molds: As mentioned, silicone molds offer intricate designs like flowers, leaves, shells, or even tiny animals.
- Cookie Cutters: For slightly larger mints, roll out the dough thinly (about 1/4 inch thick) and use tiny cookie cutters (like mini hearts, stars, or seasonal shapes).
- Garnishes: Add a final flourish to your mints!
- Sprinkles: Edible glitter, nonpareils, or themed sprinkles can add sparkle and fun.
- Sugars: Roll them in colored sugar or sparkling sugar for an extra shimmer.
- Edible Flowers: For an ultra-elegant touch, press tiny edible flower petals onto the mints before they set.
Tips for Success and Storage
A few final tips will ensure your cream cheese mints are a smashing success every time:
- Don't Rush Softening: Seriously, fully softened cream cheese and butter are non-negotiable for a smooth, lump-free dough.
- Powdered Sugar is Your Friend: It’s easier to add more powdered sugar if the dough is too sticky than to correct it if it’s too dry. Always have extra on hand.
- Wear Gloves: When mixing in food coloring or shaping the mints by hand, disposable food-safe gloves can prevent stained fingers.
- Storage: Once set, cream cheese mints should be stored in an airtight container in the refrigerator. They will stay fresh for up to 1-2 weeks.
- Freezing: For longer storage, cream cheese mints can be frozen for up to 2-3 months. Place them in a single layer on a parchment-lined tray until solid, then transfer them to a freezer-safe bag or container, separating layers with parchment paper. Thaw in the refrigerator before serving.
- Presentation: Arrange them beautifully on a platter, in small cupcake liners, or package them in clear bags tied with ribbon for charming gifts or party favors.
Conclusion
Learning
how to make cream cheese mints is a delightful journey into the world of easy, no-cook confections. With simple ingredients and straightforward steps, you can create a batch of these soft, refreshing, and customizable candies that are sure to impress. Whether you're aiming for a touch of nostalgia, a festive addition to your holiday spread, or an elegant favor for a special event, cream cheese mints offer unparalleled versatility and deliciousness. So gather your ingredients, unleash your creativity, and get ready to enjoy the sweet reward of these old-fashioned favorites!